Hyper-V is a built-in virtualization software from Microsoft that allows users to create virtual environments and run different operating systems. Using Hyper-V, you can virtualize your hardware components like Hard discs, RAM, and also network. Hyper-V feature is available in Windows 11 Pro, Enterprise, and Education editions as an optional feature. You can enable Hyper-V in Windows 11 Supported editions just by making a few clicks. In case, you’re running Windows 11 Home edition, then it doesn’t have the Hyper-V feature out of the box. Due to this reason, users have to rely on third-party Virtualization programs VMware and VirtualBox. In case, you don’t want to upgrade to Windows 11 Pro edition just to enable Hyper-V Manager, then the good thing is there’s a quick workaround using which you can enable and install Hyper-V Manager in Windows 11 Home edition manually using a script. Before you start, it is very important to check if Virtualization is Enabled on Windows 11 PC. If it’s disabled, then Enable Virtualization on your Windows 11 PC. In case, Virtualization is not supported by CPU, then you won’t be able to enable Hyper-V on your PC. Stop reading this post right away. If you made up to this line, then we presume that the Virtualization feature is enabled on your Windows 11 PC.
Enable and Install Hyper-V on Windows 11 Home
To help you out, we decided to cover this blog post in which you will find step-by-step instructions for the following:
Add Hyper-V in Windows 11 Home Enable & Install Hyper in Windows 11 Home
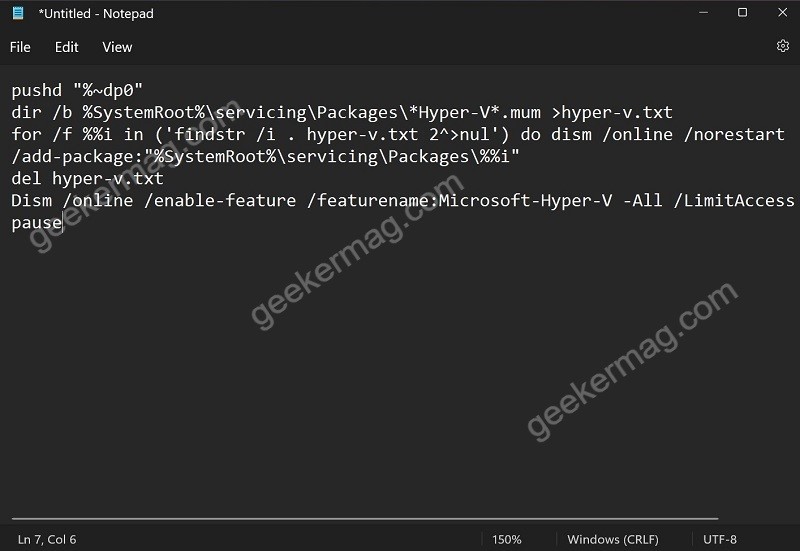
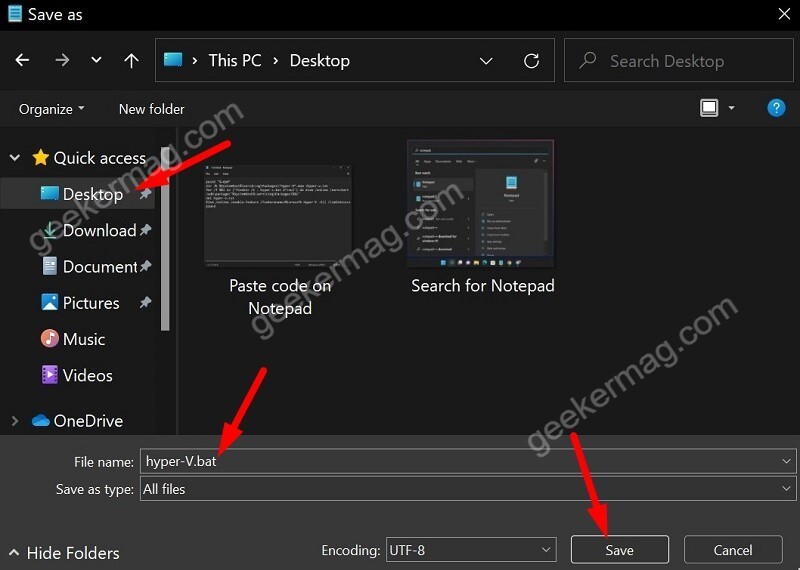
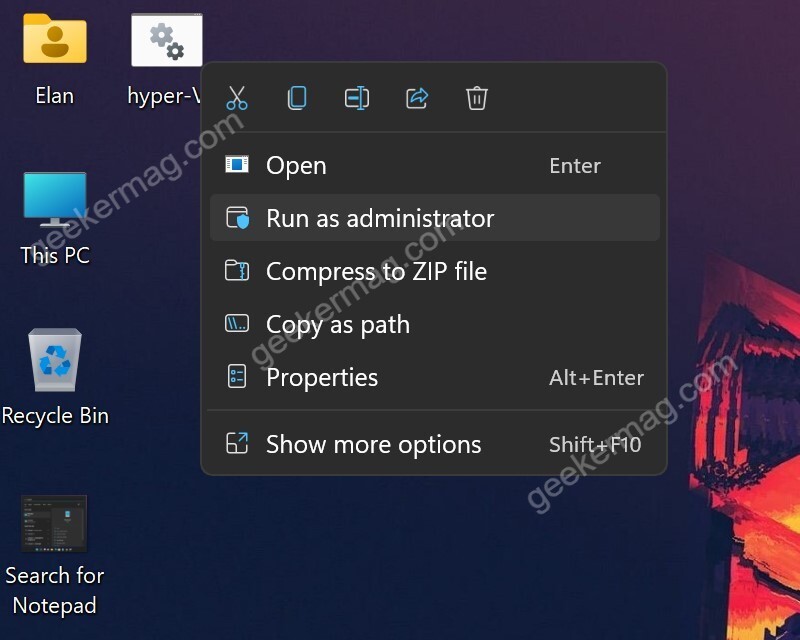
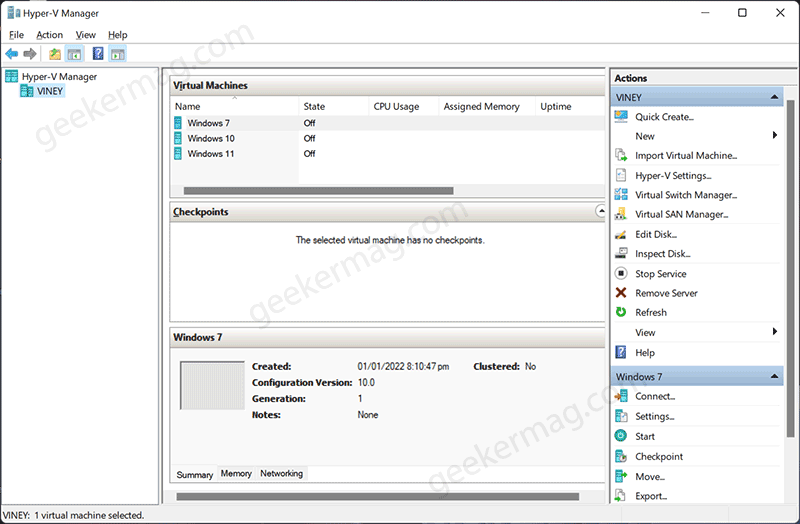
So without further ado, let’s get started: Open Notepad file on your Windows 11 PC. For that, click on the Search icon and type Notepad. When it appears in search results, click to open it. In the notepad file, you need to copy and paste the following code: Click the File > Save as. When the Save a dialog box appears, you need to type a name for the file. Now save the Notepad file as Hyper-V.bat (or whatever you want to name it) and select location where you want to save it, (select desktop for ease), and then click the Save button to save the script. Right-click on the Hyper-V.bat file that you have created and select Run as administrator. If the UAC dialog box appears, click Yes to continue. This will open the command prompt window and run the batch file. Basically, this batch file will download and install all the files required to run Hyper-V using DISM Tool on Windows 11 PC. The process will take around 5-10 minutes. Once the process is complete, you will get a message “The operation is completed successfully. Restart windows to complete this operation“. Here, you need to type Y, and instantly your computer will restart and complete the remaining installation process. At this point, you have successfully added a Hyper-V feature to a PC running Windows 11 Home Edition. Now, if you search for Hyper-V using Windows Search, this time it will appear in the search results. Click to open the app and create your first virtual machine. You can either use Quick create or New > Virtual machine depending on your choice. Follow the on-screen instructions to set up a virtual machine on your Windows 11 PC. In case, you’ve no clue about how to create a virtual machine, then you might be interested in reading How to Install Windows 11 on Windows 10 using Hyper-V.
How to Disable Hyper-V on Windows 11 Home
The process of disabling Hyper-V is the same as other editions of Windows 11. Here’s what you need to do: Click on the Search icon and type Turn Windows features ON or OFF, and when the same window opens up, look for the Hyper-V option, uncheck the box for it, and click OK. Restart to apply the changes. If you are facing problems like “This PC Can’t Run Windows 11” while installing Windows 11 on Hyper-V manager then check our previous tutorials to fix it.